SAML SSO - Okta
The ABsmartly Web Console supports SAML SSO with Okta. This guide will walk you through the steps to get it set up!
Configuring Okta
In Okta, login as an administrator and ensure that you are in the Classic UI.
Once there, expand the Application menu on the left and click on Applications. Once there, click the Create App Integration button.

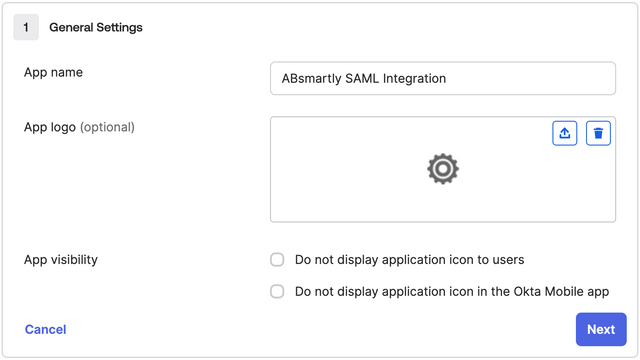
Create a SAML Application
Choose SAML 2.0 as the Sign on method and click Next.

Provide an App name and click Next.
For an App Image, feel free to download our logo here: https://docs.absmartly.com/img/logo.png
It can be added to the Okta integration by clicking on the Upload Logo button and selecting the downloaded image.
In the SAML Settings section, paste your provided SSO url into the Single sign on URL field and set the
Audience URI (SP Entity ID) field to absmartly. The Name ID format should be set to EmailAddress,
the Application username should be set to Email and Update application username on
should be set to Create and update.
Your SSO url will be provided by ABsmartly, but it usually takes the form of:
https://<your-assigned-subdomain>.absmartly.com/auth/saml/okta/callback
In the Attribute Statements section, click Add Another and add the following attributes:
firstName-Basicwith a value ofuser.firstNamelastName-Basicwith a value ofuser.lastNamedepartment-Basicwith a value ofuser.department
We use these attributes to set up each user's name and department in ABsmartly. Click the Next button.

Finally, choose I'm an Okta customer adding an internal app and click Finish.

Add Users to your SSO Integration
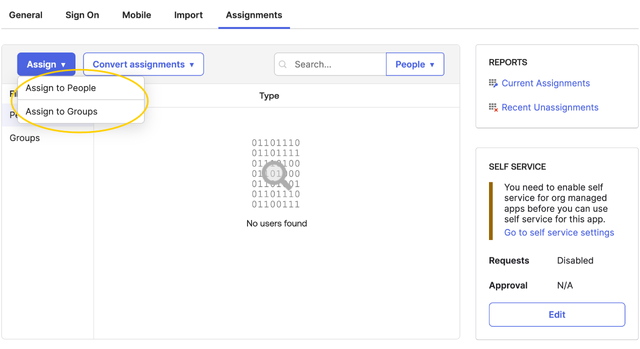
After the previous step, you will be redirected to the Sign on tab of your newly created SAML application. Click on
the Assignments tab to start defining who can sign in with Okta. Click on Assign and either Assign to People or
Assign to Groups depending on your needs.
Sending Us The Integration Metadata
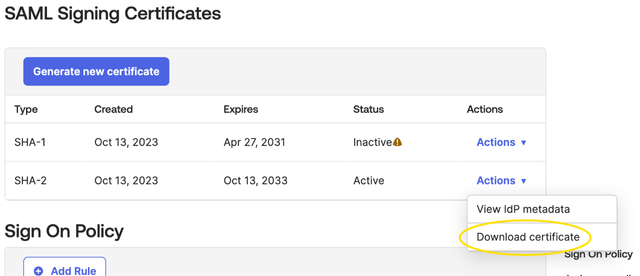
Once you have completed the previous steps, you will need to send us the integration metadata. To do this, click on the
Sign on tab of your newly created SAML application and scroll down to the SAML Signing Certificates section.
Click the actions button next to your most recently created Signing Certificate and select Download Certificate.
After downloading the metadata, send it to us via email or Slack and your employees will be able to sign in to ABsmartly using Okta!